How to use React Developer Tools in 2026
A practical guide to installing React Developer Tools, inspecting props and state, and profiling slow React behaviour in a Chrome-based workflow.

Seeing what a React app is actually doing — without reading half the codebase first — is still what React Developer Tools does best. Hook it into a Chrome-based workflow. Component tree, live props, hook values, render timing. All in a few clicks. First useful setup? About 15 minutes.
Browser DevTools show you network requests and DOM output. They do not always show the React decisions underneath. React Developer Tools fills that gap. Inspect the component that owns the bug. Test state changes before you touch source files. Profile slow interactions when a page feels off rather than plainly broken.
1. Install the extension in the browser you already use
Grab a Chromium browser. Chrome, simplest route. Edge, same deal. Install the DevTools extension. Pin it if your team jumps between tabs during local testing.
Fire up a React app after install. Attached correctly? The browser DevTools window shows two new tabs — Components and Profiler. Do not see them? Refresh once before you assume something broke. React’s own docs say the tool works across major browsers and React Native. Older React Native versions (before 0.76) are better off with the standalone build, not the browser extension.
One more thing: run this first check on a local build. Not a complex staging stack. You want a clean signal. A tiny sample app. A branch preview. Whatever part of the product is already misbehaving.
2. Open Components first and find the real owner of the UI
Most React debugging starts with the wrong question. Developers inspect the DOM node on screen, then work backwards through wrappers and generated class names. Skip that. Components is faster — it shows the React tree, not just the HTML that fell out the other end.
Click the element picker inside DevTools, choose the broken bit of the interface. The tool jumps to the matching component. From there, step one level up or down the tree until you land on the component that actually owns the behaviour. A button renders the symptom, sure. But the parent form, the table row, the layout shell — those own the state that caused it.
This is the before-and-after that earns its keep. Before: guessing which file matters. After: knowing whether the fault sits in SearchResults, UserCard, CheckoutForm, or some parent wrapper with a name you did not think to check. That cut alone halves debugging time.
3. Inspect props, state and hooks without editing code yet
Right component selected? Good. Now pause. Do not open the editor yet.
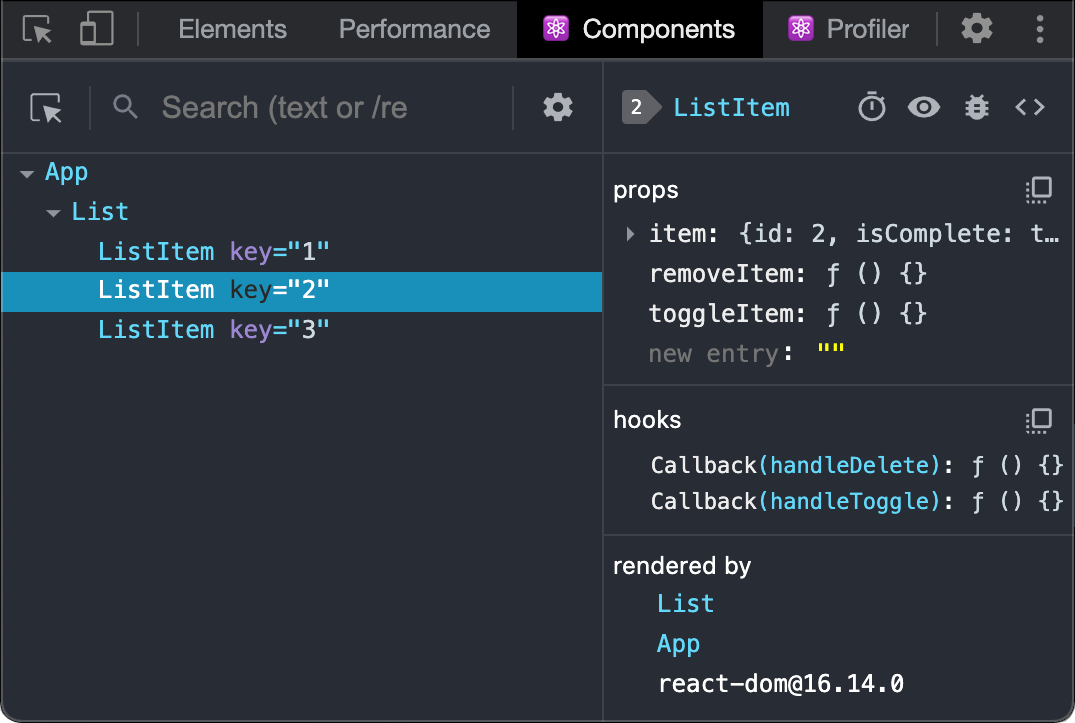
React Developer Tools can answer a handful of questions on its own. Did the props land in the shape you expected? Did state update at all? Is a hook value stale because a parent never re-rendered? Expand props first — look for missing fields, surprise null values, old IDs, booleans stuck on false. Then state and hooks. One panel, current values, no scattering console.log across six files. This is where the tool leaves a pile of print statements in the dust.
React’s own docs hammer this point: inspect data in place before you change implementation details. A recent Boundev debugging walkthrough lands on the same habit — Components as the fastest way to confirm whether the bug sits in data flow, rendering, or timing.
On a safe local build? Edit a prop or state value right inside DevTools to test your theory. That skips a whole code-edit-reload cycle. List appears when isOpen flips to true? Error banner vanishes when a prop gets valid data? You have narrowed the bug before touching the repo.
4. Use the tree to trace context and hook-driven behaviour
Shared state. That is where modern React bugs hide. The broken button is not broken by itself — it reads from context, or a custom hook, or a parent component that memoised the wrong thing. React Developer Tools helps because it shows hook values and the tree around them at the same time.
Start with the selected component. Two questions. Where does this value come from? What has to change for it to update? Answer is “context” — climb until you hit the provider. Answer is “custom hook” — inspect what that hook returns and compare it across sibling components.
Short reset. Do not chase everything at once.
Pick one suspicious value. Trace it through the tree. That keeps the session sharp. Otherwise Components turns into a tour of your architecture rather than a fix.
This is also where the tool fits a 2026 React workflow. Not a replacement for source control, tests, browser network panels. A shortcut. From noticing odd behaviour to forming a precise hypothesis. Even the broader roadmaps — like this 2026 React workflow explainer — now treat debugging fluency as core toolchain, not afterthought.
5. Open Profiler when the bug is about speed, not correctness
Components for wrong UI. Profiler for slow UI. Open it when a search box lags, a modal stutters, a dashboard turns heavy after each filter. Record a session. Do the slow interaction. Stop the capture. Inspect what re-rendered.
Hunt for large commits, repeated renders, components that updated though their inputs barely moved. A list item re-rendering 200 times is a real lead. “React feels slow” is not. The profiler hands you timings you can act on.
Narrow. One interaction per trace. Page load, menu hover, live search, and chart redraw all in the same session? The output turns to noise. A smaller capture makes the expensive bit jump out.
Before the profile you might blame data fetching, or browser paint. After the profile you can say something sharper: this parent re-rendered the whole table, this memo boundary failed, this derived value recalculated on every keypress. That is the shape of the problem. Now you can rewrite.
6. Turn the findings into a repeatable debugging loop
React Developer Tools pays off as a loop. Not a one-off rescue. Open Components. Find the owner. Inspect props and hooks. Confirm the state change. Switch to Profiler — but only if performance is the issue.
Order counts. Profile too early and you measure a screen wired to the wrong prop. Change code too early and the parent component or context provider that caused the whole thing sits untouched.
Keep a short list beside the browser:
- Can you reproduce the bug on a local build?
- Which component actually owns the UI state?
- Which prop, hook, or context value looks wrong?
- Correctness, performance, or both?
- What single change confirms the hypothesis?
Five questions. Usually enough to go from “feels broken” to a controlled fix.
Troubleshooting
Components and Profiler tabs missing? Refresh the app, check the extension is installed, confirm the page is running React at all. React Native, not web? Versions before 0.76 need the standalone React DevTools path.
Values look frozen? You might have grabbed a presentational child — it only receives already-processed data. Move up the tree. Profiling data noisy? Shorter recording. One interaction, not five.
What to do next
Once this feels natural, pair React Developer Tools with the browser’s network and performance panels. Not rivals. Different jobs. React Developer Tools explains component behaviour. Browser DevTools confirm requests, payloads, and rendering cost around it. Together they give web teams a faster line from symptom to fix. That is the whole point.
Soren Chau
Enterprise editor covering AWS, Azure, and GCP in the AU region, plus the SaaS shaping local IT. Reports from Sydney.